Ah, the allure of Amazon selling. You’ve seen the YouTube videos, read the blog posts, and perhaps even listened to a podcast or two. You’re convinced: launching your Amazon business is your next big step.
But before you start dreaming of passive income and beach vacations, there’s one crucial thing you must do first—setting up your Amazon Seller Account.
You’ve probably heard stories of aspiring sellers getting banned upon their account creation, and you are hoping you don’t get in the same situation. And you don’t have to.
Amazon can be strict, but if you follow certain steps and do the right things, opening an Amazon account will be a breeze.
This article aims to equip you with the knowledge you need to open an Amazon account without hiccups.
Without further ado, let’s get into it.
Setting the Stage: Choosing Your Account Type
When opening an Amazon account, you are presented with two paths; you can either go down the lane of a Professional Seller Account or take the seemingly simpler route of the Individual Seller Account.
The Professional Account costs $39.99 a month but comes with a suite of features that will make your life as a seller easier. On the flip side, the Individual Account is free but charges you 99 cents for each item you sell.
If you’re looking to sell more than 40 items a month, the Professional Account is your best bet. But the choice is yours, and it can affect your journey from the get-go.
Our advice? Go for the professional account. As a seller, you should aim to sell more than 40 items a month, and the professional account will give more ROI.
Plus, you get a lot of benefits such as eligibility for Amazon’s pay-per-click (PPC) advertising platform, top placement on product detail pages, etc.
Additionally, if you do not sell anything for about 3 months using the professional seller account, you can message Amazon’s customer support to ask for a refund.
So in the end, it’s really a win-win with the professional seller account.
Teaser Alert: Keep reading to discover the five deadly sins that could get you banned from Amazon before you even start.
The Nitty-Gritty: Getting Started
You’ve made your decision. You’ve taken a deep breath. Now it’s time to dive in.
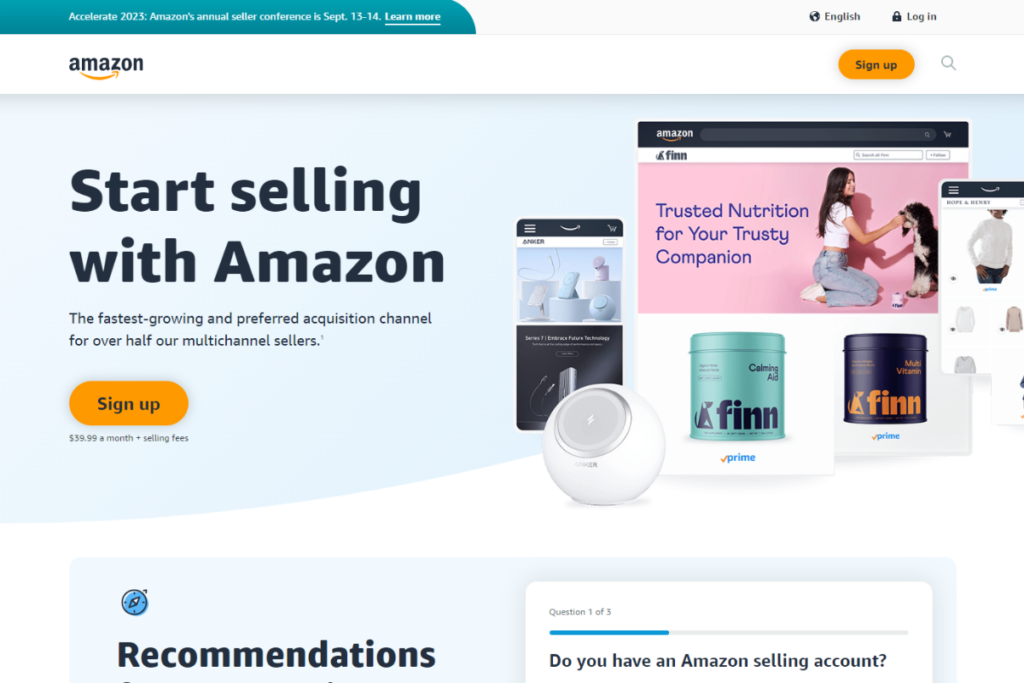
Head over to sell.amazon.com and look for that tantalizing “Sign Up” button. Click on it like you’re clicking on the gateway to your future empire.
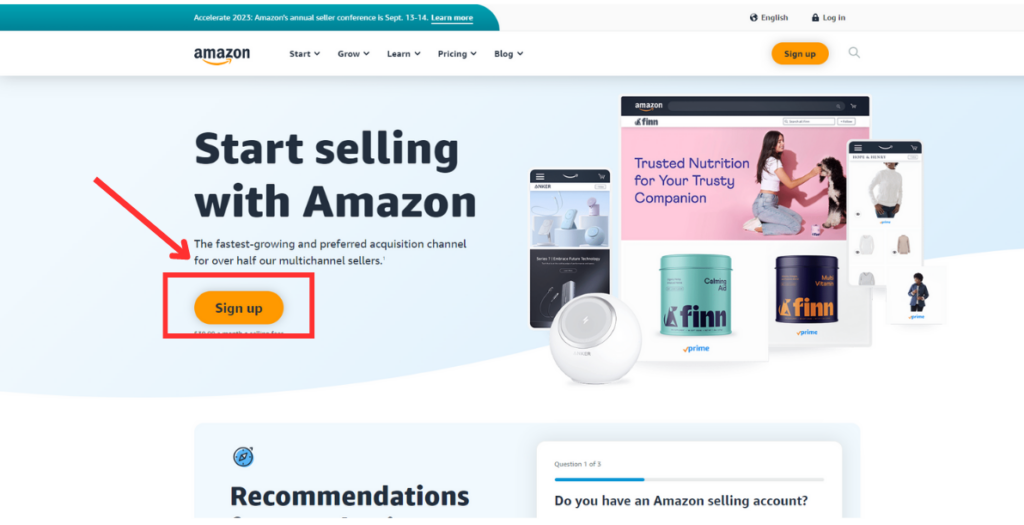
But here’s where you need to pay extra attention; by clicking this sign-up button, you are choosing the Professional account type. If you pay enough attention, you can see it written in fine print just below the sign-up button.
But if you decide to go with the Individual Account, Amazon plays a little hide-and-seek with you. You’ll need to scroll all the way to the bottom of the page and click on where it says “Sign up to become an individual seller”.

A bit sneaky, isn’t it? But we guess this is Amazon’s way of pushing the Professional Seller plan.
Timing is Everything: Plan Ahead
Time waits for no one, especially not for a budding Amazon seller. Before you even think about sourcing products, make sure you set up your account a few months ahead of your planned launch.
Why? Because approval processes can be slow and you don’t want to be stuck in limbo while the world moves on.
Things You Need to Open an Amazon Seller Account
To open an account, you need the following things:

- An email address
- A phone number
- Business Information
- Contact address
- A chargeable credit card
- Identity details
Business Information
- Entering Business Name & Location: The first step is to enter your business name and confirm the type of business and location.
- Company Registration Number: This usually refers to your Employer Identification Number (EIN) in the United States. The EIN can be obtained quickly for free from the IRS website.
- Registered Business Address: You’re required to provide the address where your business is registered. It’s okay if it’s your home address, as long as the business is registered there. If you’re not located in the U.S., hiring a registered agent to provide an address is an option.
- Business Phone Number: You are also required to provide a business phone number which a PIN will be sent to for verification. You can provide your personal phone number/ business number but if, for some reason, you can’t or don’t want to, you can use Google voice to get a business voice number.
Seller Information
- Personal Information: You’ll need to provide your name, country of citizenship, and country of birth. This is applicable even for those outside the U.S.
- ID Verification: Either a passport number with its date of expiration or a driver’s license number with its date of expiration is required.
- Owner Information: You have to specify if you’re the sole owner of the business or if there are other owners. If there are other owners, additional information will be needed.
Billing Information
- Bank Account: A valid bank account is required for transactions with Amazon. You can easily get a business bank account using your business paperwork. The name on the bank account should match your name or your registered business name.
- Routing and Account Numbers: These can be found at the bottom of a check from your bank. Some banks might not be eligible for instant verification and may require a bank statement.
- Credit Card: A valid credit card (not a debit or prepaid card) is needed to pay the monthly fee or the 99-cent charge per item sold for individual sellers.
Filling Out the Forms
Setting up your Amazon Seller Account just as simple as filling out a form for a library card, provided you have the right information (listed above).
Once you do, you will go through a series of processes (5 in total), from filling the Business form all the way to the verification.

Just plug all your details in and you’ll be good to go.
Note, during the registration process, you will be asked if you have Universal Product Code (UPC) for all your products. Our advice is for you to choose yes.
Products with UPCs are often seen as more legitimate or professional and it also makes it easier for Amazon to track inventory and sales data.
Though UPCs are had to find manually. You’ll have to sift through the source code of the product’s web page. But the Ecom Circles Extension offers a simpler solution.
The tool displays the UPC codes along with other useful product information. Plus, it has other amazing features like Keepa graphs, FBA calculator, and so on. Do well to check it out.
Once you’ve done all this, you’ll be asked to upload your verification documents and agree to Amazon’s terms. And voila! Your Amazon seller account is set up, but remember, the journey has just begun.
The Landmines: Reasons for Getting Banned
Now, remember that teaser we dropped earlier? It’s time for the reveal. There are five common reasons why people get denied from selling on Amazon, and you should be avoiding these like a cat avoids water.
- Duplicate Accounts: If you’ve ever dabbled in selling on Amazon before, tread carefully. Amazon doesn’t like sellers having multiple accounts.If you have an old account, don’t create a new one; instead, get in touch with Amazon to sort it out. Note that the only way you will be allowed to have more than one account is if you have a new business you want to operate separately.
- Using Debit Cards or Prepaid Cards: When Amazon asks for your credit card details, they mean a legitimate, bona fide credit card. Use a debit or prepaid card, and you’re calling for trouble.
- Inadequate Business Details: Always provide genuine business details. And we advise that you use a business email to open your seller account, rather than a Gmail or Yahoo one. Now there’s nothing wrong with these two emails, a professional email just looks better to Amazon that you’re serious about this venture. You can get a professional business email for as low as $1.24 with Namecheap.
- Incomplete or Incorrect Documentation: Whether it’s your identification, bank details, or business registration, make sure all your papers are in order.
- Not Following Amazon’s Guidelines: This one is self-explanatory. Always, always follow the rules.
Conclusion
Starting your Amazon FBA business is akin to embarking on an epic quest. There will be trials, there will be tribulations, but the rewards can be monumental.
Setting up your Amazon Seller Account is your first step, and while it may seem daunting, it’s perfectly doable if you approach it with diligence and attention to detail.
The choices you make now will shape your Amazon journey, so choose wisely, and remember, the road to Amazon success is paved with well-thought-out decisions.
Check out our automated tools for Amazon sellers now!